My Experience Using AI Remover From Image Tools for Content Creation
Like many content creators, I have had trouble making my images look clean and professional. And manually editing out backgrounds used to take too much time, yet still the final product would occasionally look less than perfect. This inevitably slowed the overall process of generating content.
I then began investigating what could be faster and simpler, and I finally stumbled upon the AI background removal tool. Initially, though, I had some doubts about whether or not these tools would do as good a job as a hand editor. Nevertheless, I decided to try them out and see if my work would become that much smoother.
After using these tools for a while, I could freely calculate how much time and elbow grease they saved me. Things that often lasted minutes to hours could be done in just a few seconds now, and it has fundamentally changed what I was creating media for.
What Problem I Was Facing Before Using AI Tools
Simple Editing Was Taking Too Long
I used to spend a lot of time painting away these backgrounds using simple editing tools. Even minor modifications were an effort, and it slowed down all production processes more than you realise. Frequently, I would redo the same image time and again just to get a clean result. That was very frustrating when I had tight deadlines.
My Content Looked Less Professional
Some of the images I made with these tools did not look as clean as I wished. The edges are often rough, and the final work did not feel polished enough for social media or branding purposes. As a result, my content sometimes failed to catch the eye of anyone, no matter how good an idea it was.
I Needed a Faster Workflow
I realised I needed a more rapid, easier way of editing images. My aim was to cut down on editing time and concentrate more on creating & posting material consistently without pauses. Also, I was after a solution that could manage most jobs automatically without requiring know-how in advanced editing.
First Time I Tried an AI Background Remover Tool
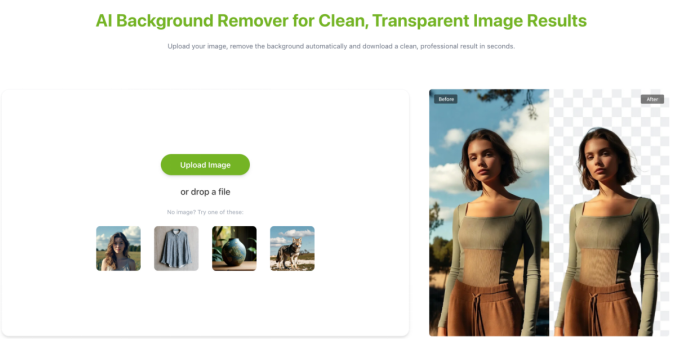
Easy Upload Process
The first thing I came across was how very easy it is to use. On the upload page, my picture was simply added, and no complicated process or settings were required. Everywhere felt extraordinarily beginner-friendly immediately. It felt immediately much easier than the traditional editing software I had used in the past.
One-Click Background Removal
After I uploaded the image, I clicked one button, and then the tool began working automatically. There was no need for me to manually select edges or use any advanced tools. Within seconds, its background had been totally removed, which frankly surprised me. It was surprising
Instant Results Surprise
The final result was very soon made clear, and of a better quality than what I anticipated. The character looked clean, with smooth edges that required no extra effort to put into them. At that moment, I knew how effective AI tools like these really are for content creation.
Tools I Personally Tested
RemoverAI – My First Choice
RemoverAI was the first tool I tried. It seemed quite straightforward to use. The interface was neat, and I could remove backgrounds without any confusion. Instant results, especially for simple images. AI remover from image also gave me an insight into how AIs work. Since I was a rookie in every way, I required nothing to learn, and thus everything went smoothly. Starting here on my journey of experimenting with AI manipulation tools.
Remove.bg – Fast & Accurate
Speaking of speed, Remove.bg was very impressive merely from the point of view that such a tool could be so quick. It treated portraits excellently and left unblemished all of the important details, such as hair and edges. I wish the results were consistent, not just across the same kind, but also across different image types. It has proved invaluable to me in getting quick edits out for social media content. The dependability of this tool is one reason it was a personal favourite of mine.
Canva – For Final Editing
Canva was used for both background removal and overall visual design. After removing the background, I used Canva to place text, effects, and layouts. It helped me convert simple images into social media-ready full content pieces. All because it made my workflow much more creative: everything was in one hand at any time and required no changing tools.
How AI Tools Changed My Content Creation Workflow
AI background remover tools have completely changed the way I approach content generation. Jobs that took several minutes now take just seconds. When it took me less time to edit my videos, this would help a lot with consistency in uploading and managing my time.
Furthermore, my images looked a lot better afterwards. They now looked cleaner, more professional and more in line with what is wanted by social media and branding workers scraping web pages. Small things like edges and cutouts looked sleeker, which made my whole output look more eye-catching on the whole.
Most importantly, with the most difficult parts already done by AI, I could now spend more time on creativity instead of hard technical editing work. So my entire work process became lighter and more pleasurable.
Final Thoughts – Start Your AI Editing Journey Today
If you're still spending a long time doing manual background processing, then the best step you can take today is to switch over and use AI tools. These are quick and easy and can revolutionise the way you produce content, just as they did for me. Even the simplest image can be professional with the right images.
Start experimenting with tools like RemoverAI, Remove.bg, or Canva – and see for yourself how much better things look now, even when the content is rudimentary. stepping up the truck return at its work
Get going today: start upgrading your process for creating content. The sooner you do it, the more rapidly you will increase your visuals and keep up in this digital age of ours.